The Process to link ContentBot.ai to Zapier and create your first Zap
Contentbot.ai can easily be linked to Zapier to kick start your workflows, please see the video guide below that follows the steps required, alternatively please review the text based guide underneath the video
Step 1.
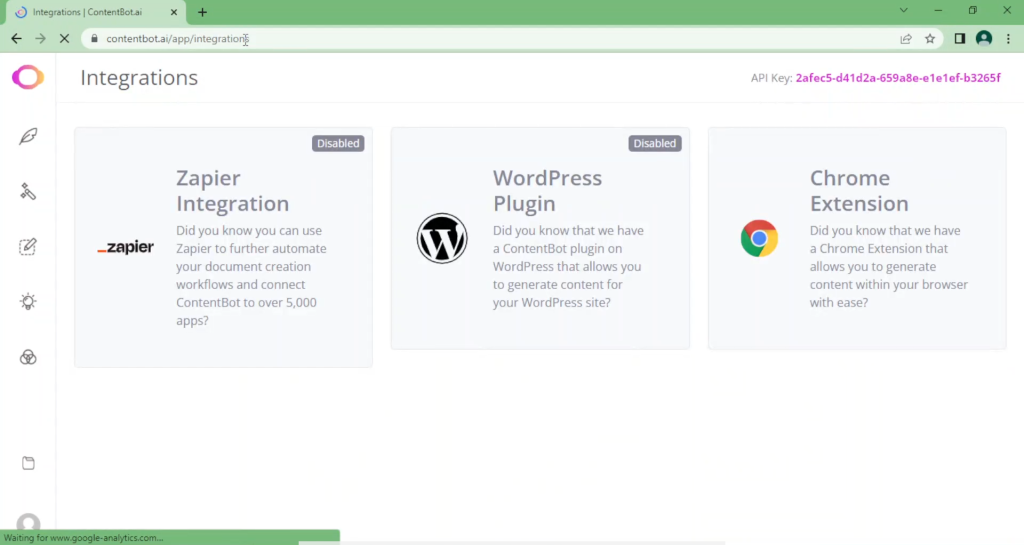
Navigate to Https://contentbot.ai/app/integrations
Step 2.
Click on your API key in the top right corner, to copy it to the clipboard (you’ll need this later)
Step 3.
Click on the Zapier Integration tile and then select the Zapier Integration link on the next page. This will take you to Zapier to link your ContentBot.ai account to Zapier and create your first Zap
Step 4.
Select the Connect ContentBot to 5,000+ apps button, and signup to Zapier (if you have not done so already). You can Signup using Single Sign On from Google, Facebook or Microsoft, or sign up using an email address.
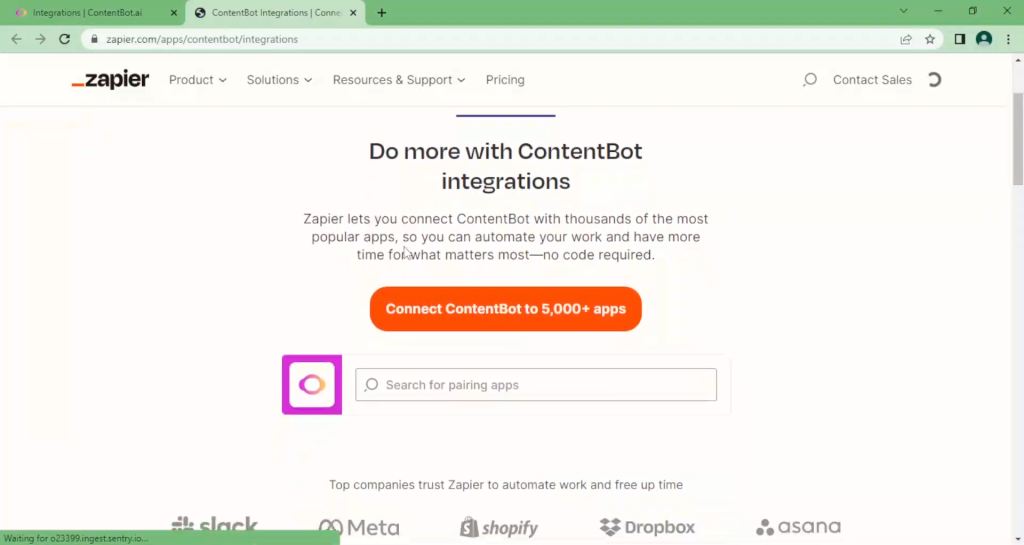
Follow the Zapier onboarding workflow where you will Select your Role, company size, and the apps you use, this will help Zapier personalise you workflow recommendations, but you can skip this step if desired, then select Finish Setup
Step 5.
Defining the Trigger: Immediately after Finishing your Zapier onboarding, you will begin to set up your your first Zap. Click on the Trigger tile to expand it. Then click the Event input box to reveal the trigger event options and select Publish Document and then Continue to reveal the Choose account Section
Step 6
Linking the Trigger App (Contentbot.ai): Click on the Sign in button next to the Connect ContentBotoption. Here you will be requested to enter your ContentBot.ai API key. Paste the API Key you copied in Step 2 into the API key input box, and select Yes, Continue to allow Zapier to Access your ContentBot.ai account. Your Accounts are now linked, select the Continue Button to finish setting up your first Zap
Note: Steps 1 to 6, guide you through linking your ContentBot.ai account to Zapier as part of a “creating your first Zap” workflow . If your goal was only to link your ContentBot.ai Account and not to create a Zap, you can abandon the process here.
Step 7
Select the Test trigger button, if you do not have a a saved document ready in you Contentbot.ai account select Skip test and then Continue. Your latest ContentBot.ai document or the Contentbot.ai sample document will be pulled into the next step to continue setting up your Zap
Step 8
Defining the Action: Please select the App that will perform an action after the Contentbot.ai Publish Document trigger has occured. You can select from the suggested Apps or Search for you required app. In this example we will select Gmail to send an email
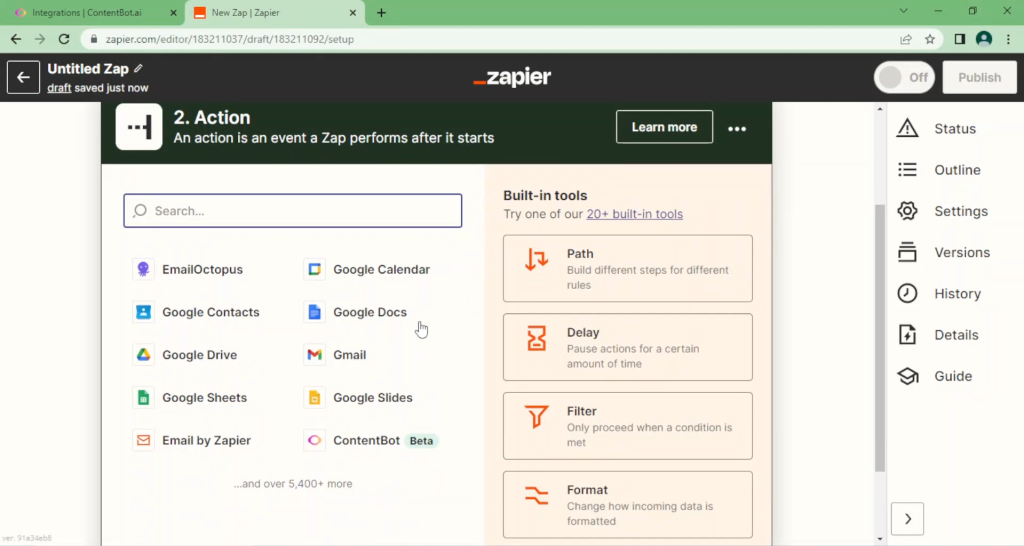
Select the appropriate Event from the event input box for your chosen app. These events are specific to that App that is chosen. In this example we will select Send Email and then Continue
Step 9
Linking the Action App (Gmail): Click on the Sign in button next to the App you have chosen for the Event, here you will need to sign into the chosen app and perform any other step that is required for linking these accounts, in the case of our Gmail example we need to Approve the permissions granted by Gmail to Zapier and then Continue
Step 10
Complete Action details: In our Gmail example, we complete the required details for our Send email event:
- Add an email address to the the To field
- Keep the default From value (Leave the field blank to user the default email address)
- Add a name in the from Name field
- Select the Contentbot.ai Document Title as the email Subject
- Select the Contentbot.ai document HTML field as the email Body
Select Continue, then Test Action to test that your first Zap is set up correctly. Once successfully tested, you can Publish your Zap.
You have now successfully Linked you Contentbot.ai Account with Zapier and published your first Zap. In this example, whenever a new Document is published in Contentbot.ai, it will be pushed into a queue where this Zap will pick up the document, and email it as per the configured details.